Vue3动态布局
第三方StackGrid框架 #
https://gridstackjs.com/#getStarted
https://grid-layout-plus.netlify.app/zh/guide/properties.html
经过考察,使用gridstackjs应用在项目中。
布局和组件 #
组件 #
项目需求为多布局切换,每个布局通过组件组合形成,组件以拖拽形式组合。
当前技术环境为:Vue3,gridstackjs
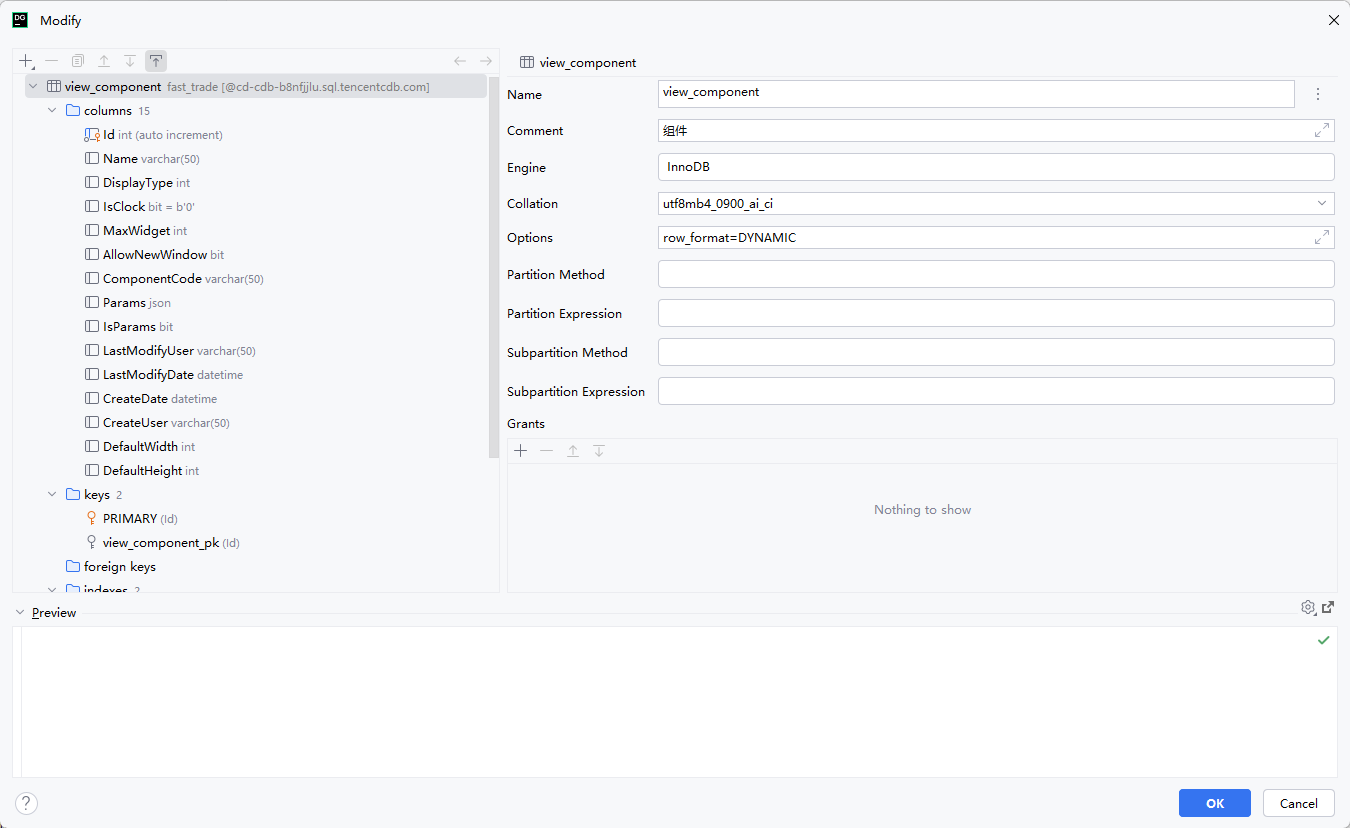
首先定义组件,组件时布局的元素,如果没有组件那么布局也就没有意义,组件通过后台维护,结构为:

挑几个关键字段说明:
- Id,自增,用于区分组件唯一标识。
- Name组件名称,用于显示Title易于区分
- DisplayType,显示范围,理解为权限,可以根据此字段控制该控件对哪些角色可见
- ComponentCode,最为重要的字段,值与组件名称保持一致
- IsParams和Params,组件可以额外定义Props,在添加组件时根据Prams反射表单填充
布局 #

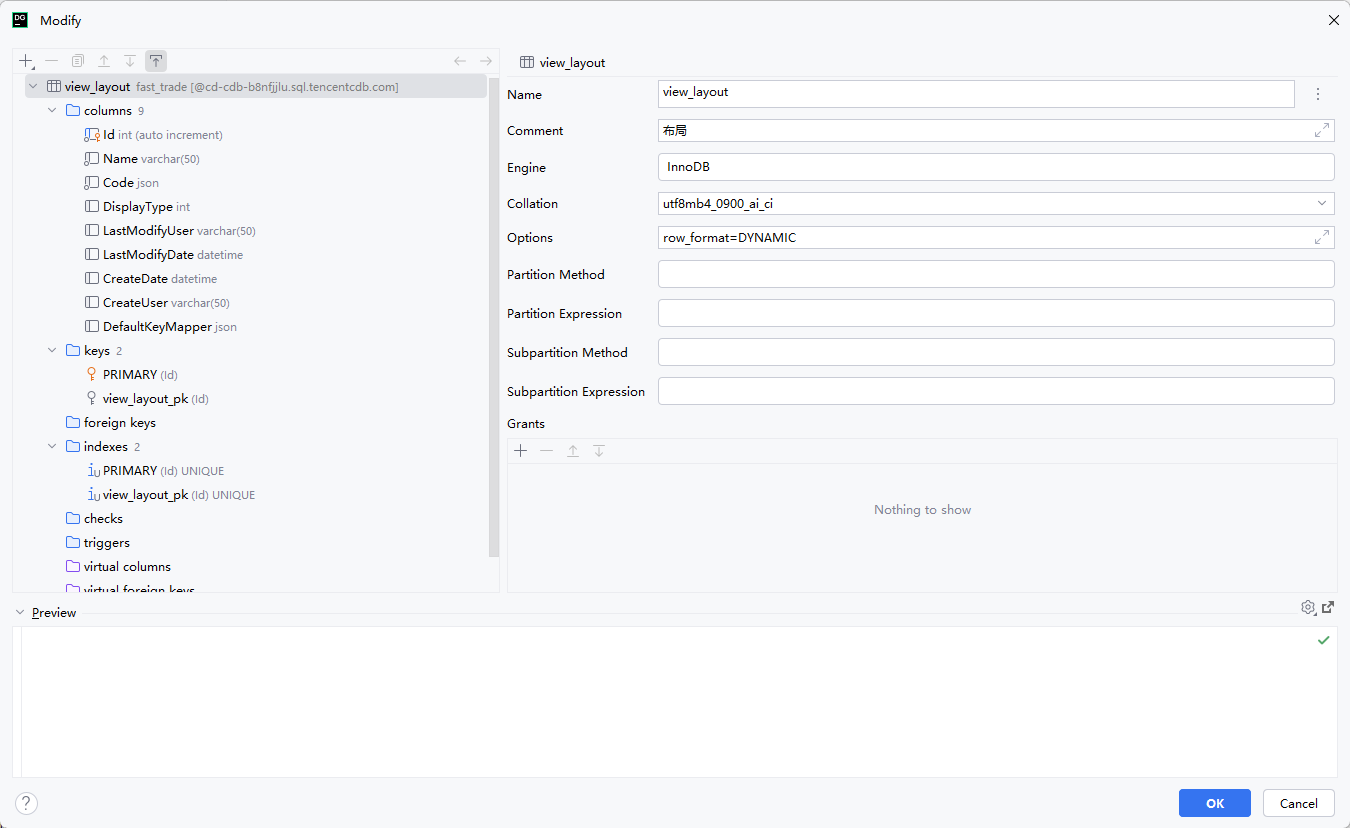
布局简单很多,其中Code为json类型,用于保存布局序列号的状态,DefaultKeyMapper用于保存当前布局的快捷键设置。
实现 #
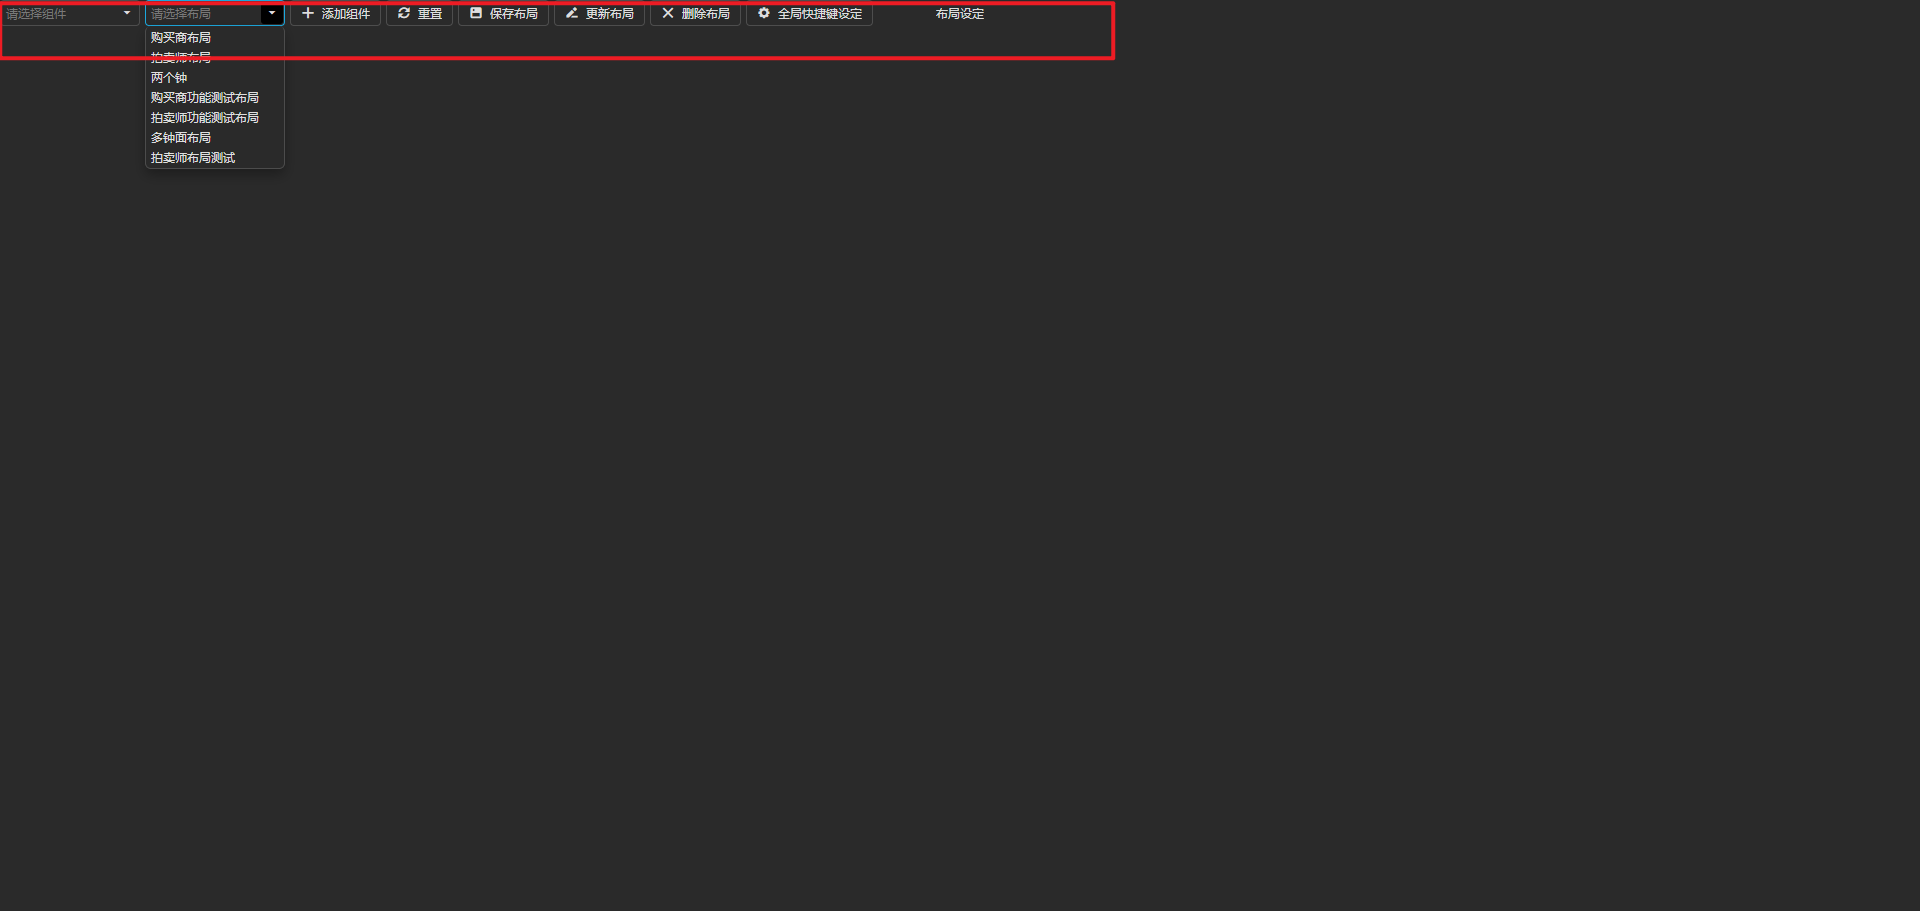
首先创建一个BuilderLayout页面用于组件布局,该页面在加载创建时请求后台已有的组件和布局用于各种操作。

可以对现有布局进行删除和更新,也可以添加新的布局。
组件的渲染 #
如何让一个写好的Vue组件在添加到StackGrid时进行渲染:
const dataSource = new DataSource({
  store: new CustomStore({
    key: 'id',
    onLoading: function (loadOptions) {
      loadingVisible.value = true;
    },

    load: async (loadOptions) => {
      return getAllComponent().then((components) => {
        allComponents = components.map((item) => {
          item.instance = defineAsyncComponent({
            loader: () => import(`../components/${item.componentCode}.vue`),
          })
          return item
        })
        return allComponents
      })
    },
    onLoaded: function (result) {
      loadingVisible.value = false;
      InitLayout()
    }
  })
})
在页面加载时获取所有组件,通过defineAsyncComponent将组件动态导入,componentCode就是表中定义的Component字段
添加组件到布局 #
const addButtonOptions = {
  icon: 'plus',
  text: '添加组件',
  onClick: () => {
    if (currentComponent) {
      if (currentComponent.isParams) {
        let paramsObj = JSON.parse(currentComponent.params)
        currentParamsForm.items = []
        Object.keys(paramsObj).forEach((key) => {
          let item = {}
          item.formType = typeof paramsObj[key]
          item.value = paramsObj[key]
          item.label = key
          currentParamsForm.items.push(item)
        })
        paramsPopupVisible.value = true
      } else {
        addComponentWidget(currentComponent)
      }
    } else {
      notify({message: '请选择组件', width: 300, shading: false}, "error", 3000);
    }
    console.log('当前组件', currentComponent)
    // addNewWidget()
  },
};
function addComponentWidget(component, props) {
  const node = {
    x: Math.round(0),
    y: Math.round(0),
    w: component.defaultWidth,
    h: component.defaultHeight,
    component: component,
    props: props
  };
  node.id = String(count.value++);
  grid.addWidget(node);
}
grid初始化后可以将组件添加到布局中,其中添加时可以指定宽高,我这里的宽高是在后台做了预设。
其中会判断组件是否有定义额外参数,如果有定义那么弹出对话框填写预设参数,填完后会进入addComponentWidget,其中component是当前下拉框选中的组件。
渲染组件 #
grid.on('added', function (event, items) {
  for (const item of items) {
    const itemEl = item.el
    const itemElContent = itemEl.querySelector('.grid-stack-item-content')
    const itemId = item.id
    let itemContentVNode
    if (item.component.isParams) {
      itemContentVNode = h(
          item.component.instance,
          {
            nodeElement: itemEl,
            ...item.props,
            onRemove: (itemId) => {
              grid.removeWidget(itemEl)
            }
          }
      )
    } else {
      itemContentVNode = h(
          item.component.instance,
          {
            nodeElement: itemEl,
            onRemove: (itemId) => {
              grid.removeWidget(itemEl)
            }
          }
      )
    }


    // Render the vue node into the item element
    render(itemContentVNode, itemElContent)
  }
});
当布局收到组件添加事件时,会将组件实例化进行渲染,实例化通过h函数,将之前defineAsyncComponent定义的instence作为参数传入h函数,同时传入预设Props和组件移除事件。
保存布局 #
使用gridstack序列化功能完成,文档链接:
https://gridstackjs.com/demo/serialization.html
顾名思义,gridstack会将当前布局中的所有组件(node)中每个组件的x,y,w,h返回。
function submit(e) {
  const {isValid} = e.validationGroup.validate();
  if (isValid) {
    let serializedFull = grid.save(true, true).children.map((item) => {
      if (item.component) {
        let componentObj = {
          id: item.component.id
        }

        delete item.content
        item.component = componentObj
      }
      return item
    })
    let layoutObj = {
      name: formName.value,
      code: JSON.stringify(serializedFull),
      displayType: formDisplayType.value
    }
    saveLayout(layoutObj)
        .then(() => {
          popupVisible.value = false
          layoutDataSource.load()
          notify({message: '已保存布局', width: 300, shading: false}, "success", 3000);
        }).catch((err) => {
      notify({message: err.response.data.Message, width: 300, shading: false}, "error", 3000);
    })
  }
}
其中我不会将组件的content也就是instence和props序列号入库,我只保存组件布局状态和组件id,下次加载布局时再通过id去查找组件,能保证每次加载组件都是组件的最新状态。
加载布局 #
const layoutSelectBoxOptions = {
  width: 140,
  dataSource: layoutDataSource,
  displayExpr: 'name',
  inputAttr: {'aria-label': 'Categories'},
  placeholder: "请选择布局",
  onValueChanged: ({value}) => {
    if (value) {
      grid.removeAll();
      currentLayout = value
      if (value.defaultKeyMapper !== null) {
        currentLayoutKeyMapper = value.defaultKeyMapper
      }
      if (currentLayout) {
        let childArr = JSON.parse(currentLayout.code)
        console.log('childArr', childArr)
        let arrs = childArr.map((item) => {
          let component = allComponents.filter((x => x.id === item.component.id))
          if (component.length > 0) {
            item.component = component[0]
          }
          return item
        })
        console.log('arrs', arrs)
        grid.load(arrs)
      }
    }
  },
};
使用 grid.load(arrs) 加载已保存布局,当然在加载前需要对布局内的组件instence进行还原。
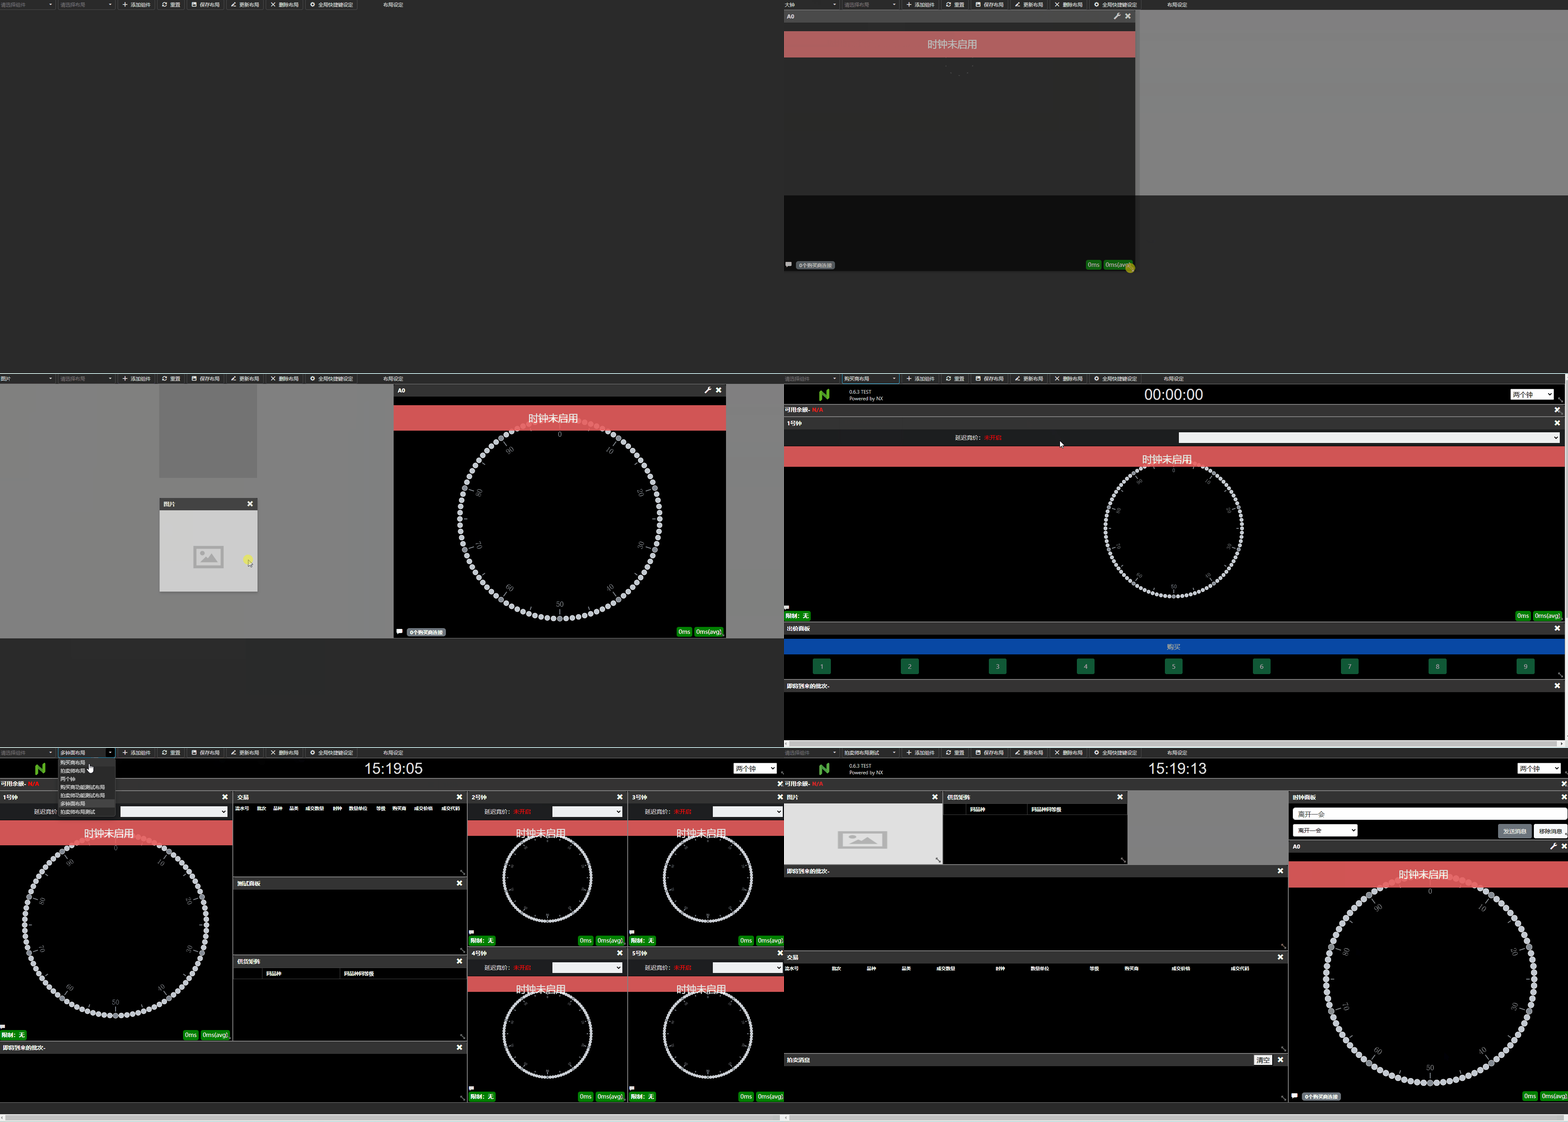
实现效果 #
